Showing posts with label Makeup. Show all posts

Friday, May 22, 2009

Basically Beauty Basics: Concealing Blemishes


So let’s face it, no one has PERFECT skin. Sure, some people have been given the gift of really good skin. However there’s always that little bump or blemish that pops up unexpectedly. No need to fret however, concealer is here to have the day. I’ll show you how to cover those nasty blemishes and give the illusion that you do in fact have that perfect face.

How to Conceal Blemishes

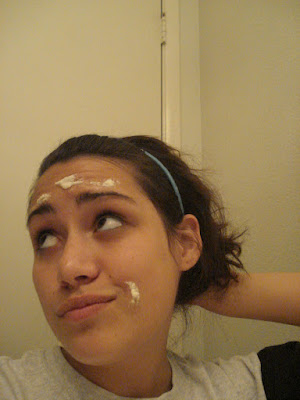
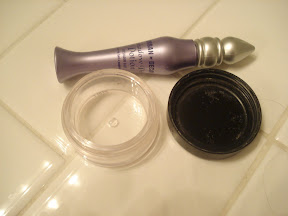
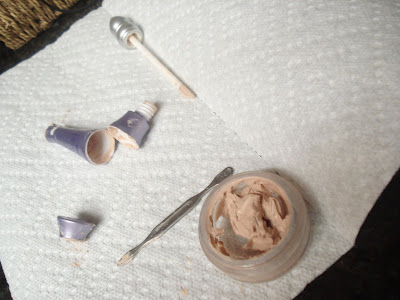
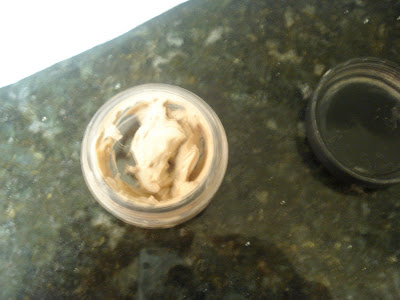
1. Your first step is not to worry. Everyone gets a zit every once in a while. It’s not the end of the world. All you need to do is calm down and gather your supplies. You’ll need a nice creamy concealer, a concealer brush, and a foundation brush in order to blend everything together. Here I used Neutrogena’s mineral concealer in Buff and for my brushes I used my Essence of Beauty conceal/foundation brush


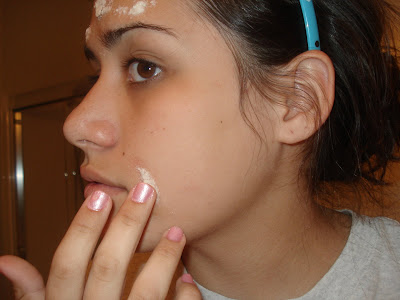
2. Before you begin to conceal anything make sure that your face is moisturized. A moisturized face makes for a better canvas. After you have moisturized, dip your concealer brush in the concealer and begin to apply it to the spots needed on your face. You don’t want it too heavy but enough to cover the blemish.

3. After you have all the spots you want concealed covered, take your foundation brush and blend the concealer so it blends seamlessly into your skin giving you that flawless coverage. Make sure you get every single spot.

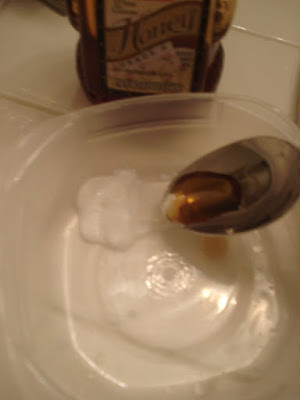
4. Once everything is blended, you’ll want to set the concealer, the Neutrogena concealer I’m using has a translucent setting powder on the bottom. But any kind of setting powder will work. If your using a powder foundation you can skip this part, but I still like to set it just to help it last longer. To set your concealer dip a clean concealer brush into the power and pat it over the spots that you had concealed. Make sure to blend and see to it that none of the powder is seen, this is why a translucent powder is amazing.

5. Now that you have set your concealer you can move onto your foundation, or if you just needed to cover a few spots, you can rock the natural look.

If you have any questions or any other ideas for Basically Beauty Basics feel free to contact me either through youtube or via email: marsmunster@gmail.com


<3
Chelsea

Monday, May 11, 2009

Vintage Green Tutorial: Golds and Greens

Well, it’s kinda funny because I couldn’t figure out how to do my makeup. Usually I find a shirt I’m gonna wear and then do my makeup based on the outfit. So I started to do my makeup and I came up with this look. It was so bizarre because I found this old shirt that I hadn’t worn in forever. I didn’t take pictures while I was doing the look because I’m a dork butt. I have the list of stuff I used! So enjoy!


Things Used in this Look:

Eyes:

Urban Decay Primer Potion: All over the lid and browbone

Revlon Revlon Cream Shadow in Not Just Nudes: All over the lid

HIP Duo in Gilded: The gold side all over the lid

NYX Eye Shadow in Lime Green: The outer two thirds on the lid

NYX Eye Shadow in Green Tea: Crease

NYX Eye Shadow in Aloha: Highlight

Jane Mineral Eyeliner in Black

Covergirl Lash Blast Mascara


<3

Chelsea

Monday, May 4, 2009

Maybelline Lash Stiletto Mascara Review


This is one of those makeup products who had a commercial. Let’s face it, if a product is on TV there’s gonna be a lot of hype. This mascara is no exception. So I joined the craze and I went out and I bought it. This is what I think:


Product: 4/5 out of 5
Packaging: 4 out of 5
Quality: 4 out of 5
Overall: 4 out of 5
Would I buy again? Indeed
Where to buy: Any local drugstore that sells Maybelline, you can also purchase it online
Price:
$7-9; like most things you can sometimes get it during a sale and in which you can bbuy one get one or get it half off. Just look around.

PROS:
-It has possibly the world’s cutest packaging
-The wand has a wonderful brush that goes from narrow to wide which is good for inner lashes.
-A nice lengthening and separating formula
-B5 vitamin which nourishes the lashes
CONS:
-It really doesn’t do much for volumizing the lashes
-It says that it has a paten shine, but in reality it’s just a wet look. It’s not really a bad thing but it doesn’t do what it says it does.
-It’s not water proof D:

Overall?
I really do like this product, the packaging sucked me in, I’m a sucker for cute things. This bottle is definitely cute. I really can see a difference in my lashes when I have it on and when I don’t. I feel like I need to do a little bit of a comparison though. If it was between this mascara and covergirl’s lashblast. Covergirl would take the cake. I think my number one complaint is about the product is that it’s not waterproof. Now there isn’t any flaking which is good, but if you rub your eyes or tear up you’re going to have raccoon eyes. So really just be careful on the days your wear this mascara and try not to rub your eyes that much. Overall though, it’s a really nice mascara. I’d definitely recommend it to a friend and buy it again!
Before

Application

After


<3
Chelsea

Thursday, April 30, 2009

Smokey Brown Look Using Mineral Eyeshadow

I’ve been on a mineral kick lately. Last summer I purchased the Bare minerals starter kit which came with almost everything I needed to do my face make. I love that kit so much. It introduced me into the wonderful of mineral makeup. Since then I’ve explored Maybelline Mineral Power and its all very nice things. Since that last summer I’ve had my eye on the other bare minerals kit, the eye kit. It has beautiful browns and peaches, and it’s just a lovely kit. Not to mention the brushes that comes along with it.
I finally broke down and bought the kit, and it was everything that I hoped it would be. It has beautiful browns and the amazing peaches. It’s love. So since I couldn’t wait to try out the kit, I was home sick and I did my makeup. I ended up creating this smokey brown look that I absolutely love.

Things used in this Look:
Eyes:
Urban Decay Primer Potion: All over lid and brow bone as a primer
Vanilla Sugar: All over brown bone as a highlight
Peach Puff: All over lid
Soft Focus Explorer: Place in the crease about two thirds into eye, darken from a more dramatic look.
Fashionista: Used on the outer V, and with a little Fix+ as eyeliner as well.
Maybelline Lash Stiletto Mascara
Stubborn Eye Khol


<3
Chelsea

Wednesday, April 29, 2009

Haul Time!


So with economy the way it has been I haven’t been hauling as much as I use to. Let’s face it, a lack of a job and everything just being plain cruddy it really hasn’t been a good time for shopping. But this past weekend my boyfriend took me out for a wonderful shopping trip. (He even drove because my car was in the shop.) We hit up a whole bunch of store and found some great bargains. I’m just going to post the pictures below and tell you what it is. If you want anything more detailed just lemme know and I’ll be happy to oblige. Enjoy!

Flirt Blush in Pink Tutu

NYX Round Lipsticks in Harmonica andNarcissus
NYX Lipgloss in Pink Frost
Sugar Lipgloss in Swizzle and Acrylic

Maybelline Lash Stiletto Mascara in Soft Black

NYX Trios in Golden/Rust/ Bronze, Purple/Deep Purple/Prune, Aloha/Mink Brown/Deep Bronze

HIP Duos in Forgiving and Adventurous
Prestige Duos in Tartan and Passionfruit
Covergirl Single in Platinum.

Milani Eyeshadow in Lily White, Blue Lagoon, and Shamrock

Lancome Mousse Blushes in Raspberry Souffle, Peach Melba, Cinnamon Glaze

Biosilk Silk Therapy, Chi Silk Infusion, Bed Head Control Freak Conditioner

Ecotools Powder Brush and Foundation Brush and Bare Essentuals Eye Brush Trio

Bare Essentuals Eyeshadow in Peach Puff, Soft Focus Explorer, Fashionista, Vanilla Sugar

Neutrogena Quad in Moonlight Violet


<3
Chelsea

Saturday, April 11, 2009

Aspirin Acne Spot Treatment


With prom right around the corner for some, or perhaps another big occasion acne is last thing anyone wants to worry about. However it almost always seems that the night before the big day a huge eruption explodes on our face leaving us with a horrible painful zit. The huge red menace can ruin a perfect evening, but not anymore! This homemade acne spot treatment helps reduce redness, pain, and swelling all with ingredients that can be found in an everyday home. After a short 10-15 minutes you will see an immediate improvement and the next day a dramatic change.


 Aspirin Acne Spot Treatment


1. First you're going to want to gather your ingredients. You'll need 5 basic items:
  • A small mixing dish
  • A spoon
  • Aspirin (I used 4, you can use more or less depending on how much you need)
  • 3/4 teaspoon of water (again this changes with how much aspirin you use)
  • 1/2 teaspoon of honey
  • Optional: Tea Tree oil, Aloe Vera, Lavender Oil (2-4 drops)


2. Once you have all your ingredients place your aspirin into your mixing dish. If you put it near an edge it'll make mixing easier


3. Now get your water and pour it over the aspirin, you may need to add more. But remember it's easier to add than it is to take away. Once the aspirin has been saturated take your spoon and begin to mash the pills. It should smash with ease into a sandy paste. If it doesn't, add a few more drops of water until you have the correct consistency.


4. After you have the sandy paste load your honey onto the spoon and drizzle that into your paste. Make sure you don't add too much because you don't want to liquefy the mixture, you want to keep it relatively thick; think Elmer's Glue.


5. You can stop here, or you can add your optional ingredients. I'll be using Tea Tree oil which is known for it's healing properties for acne. Lavender oil also works great for acne and really any other kind of healing. This step is up to you if you choose to add anything make sure you know it's safe. I got my Tea Tree oil from CVS, and 2-4 drops will suffice.


6. Before you apply the treatment make sure your face is clean and free of any dirt, oil, and makeup. A clean face is essential for any acne treatment.

7. To apply the mask all you need to do is take a clean finger and dip it into the mixture and scoop some up and press it onto the spot. Make sure it's completely coated. Going with the whole mountain analogy "make sure the mountain is covered with snow."


8. It's time to play the waiting game now! You'll need to wait about 10-15 minutes for the treatment to harden and for the spot to be saturated with the acne fighting ingredients.

9. In about 10-15 minutes the spots should be hard. Take a warm damp wash cloth and scrub the spots in a circular motion to help exfoliate the spot. Then take a clean portion of the wash cloth and wipe away the treatment. Repeat until you entire face is clear.

10. After your entire face is wiped off wash your face one more time just to make sure every thing is off. Don't forget to moisturize!


<3
Chelsea

Thursday, April 9, 2009

Depotting Urban Decay Primer Potion


Everyone loves Urban Decay Primer Potion, and as well all know the packaging sucks butt. I've had mine for about six months now and while I don't use it everyday (mainly because most of the time I'm too lazy to put on eye makeup other than eyeliner and mascara) I do use it quite a bit. About two days ago I began to struggle to get any product on the applicator. From that I deduced it was either A) empty or B) time depot. Being the faithful youtube watcher I am I figured it was time to depot. Now I didn't make a video because just in case I sliced my finger off I didn't want it to be documented on my memory card. Plus if I was missing a finger it would be a pain to try to get my memory card out to delete the photo; and not to mention all the blood that would have gotten all over the camera and ruin it. Luckily enough I didn't have any major problems and was able to get quite a bit. While this isn't a video I took pictures! Hope you enjoy.


How to Depot Urban Decay Primer Potion


1. Gather the tools needed. You'll need you Primer Potion (obviously) a container to place it in (make sure it's air tight, I suggest a jar. I used a five gram one), a serrated knife, and some sort of spatula to scrape with.


2. Now make a cut into the fattest part of the container. You'll be amazed by how much stuff is in there. (I actually got my dad to cut it for me :] He rocks my socks)


3. Now use you're little spatula. I used this little nail thingermabob that came in my nail kit. To be completely honest I have no idea what it's true use is. Anywho, just scrape the product into the jar and basically clean it out completely. Get your $16 worth out of the horribly packaged sucker.


4. Now go to the skinniest part of the container at the bottom and make another incision. (My dad made me do this one and he just sat there and laughed as I struggled. Eventually I got him to do it.) This part will have a crap load as well. Again just scrape and continue to put it into your jar.


5. Once every is scraped and tucked nicely away in it's new home, you can now dispose of the the horrible (yet pretty) packaging that it came in. You should have a good about, I filled up a good portion of my 5 gram jar and I'll be set with Primer Potion for quite some time. 


I've hoped this helped. While it doens't look like that much, it's TONS. Because think about how much you actually use each time, plus it's more sanitary because you can now dip your brush into it. Enjoy guys, and remeber utilize those Fathers, chances are they're better with knives than you are.


<3
Chelsea

Monday, April 6, 2009

Journals...arrgh

It seems like every time when I was a little kid I would always start a journal in hopes of keeping it up. But over time things would get hectic and I sorta forget eventually until I found the journal under a pile of clothes. Unfortunately that's how it's been with this blog :/ I really really need to keep a better track of it. So I think I'm gonna try to post in it every single day. No matter what. Yes. That sounds reasonable. :D

So I figure today I would talk about Big Lots. I think everyone should go check out their local Big Lots ATLEAST once a week. It's crazy all the good deals they have there. I swear when I'm out on my own for good I'm basically never going to go to a real store ever. Between the dollar stores and big lots I'm set for life. But since I doubt you guys really wanna hear about all the wonderful food they have there, I figured I should talk about the downfall of most of us. Makeup. AH! I have no words for big lots and makeup. The one closest to my house carries mainly Revlon. But the one closer to the mall has some NYX stuff. And both of them carry elf! So essentially I can get an entire look including foundation for about 10 dollars. And this is some good quality stuff! It's amazing and I love it.

I've also noticed I love alot of things. My dad always points that out and he gets mad at me because he says it loses some of it's value. Ah patoey. I have lots of love to share.

So I guess that was my little tip of the day for bargain shopping, BIGLOTS IS LOVE <3


<3
Chelsea